Interactivity
Touch
Figure elements can be made touchable (or clickable with a mouse).
To set an element as touchable, use the touch property during its definition or the FigureElement.setTouchable method on the element after its creation.
The following three examples all set an element to be touchable, and trigger a console statement when touched.
// Use a notification to handle a touch event
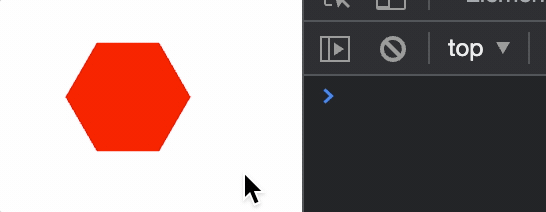
const hex = figure.add({
make: 'polygon',
sides: 6,
color: [1, 0, 0, 1],
touch: true,
});
hex.notifications.add('onClick', () => console.log('Touched!'));
// Create a touchable element
figure.add({
make: 'polygon',
sides: 6,
color: [1, 0, 0, 1],
// simply including the `touch` property will make the element touchable
touch: {
onClick: () => console.log('Touched!'),
},
});
// Set an element to be touchable after creation
const hex = figure.add({
make: 'polygon',
sides: 6,
color: [1, 0, 0, 1],
});
hex.setTouchable({ onClick: () => console.log('Touched!')});
Sometimes touching small elements can be challenging with a finger. Therefore it is useful to set how much of the area around an element can also trigger a touch event. To do so, borders and touch borders of elements can be defined.
Borders
Two Dimensions
Two dimensional shapes can have borders and touch borders to determine when shapes overlap, or when a touch event is on a shape.
Each FigureElementPrimitive has drawBorder and drawBorderBuffer properties. The drawBorder is typically a border (convex hull) around all the vertices that make up the shape. The drawBorderBuffer is usually equal to or larger than the drawBorder and often follows the contours of the border but with some additional buffer. Built-in shapes will generate these automatically, but they can also be be fully customized with a TypeParsableBorder by the user.
drawBorder and drawBorderBuffer are then used to calculate the border and touchBorder of a shape. The border can be used for determining the shape's visual edge, and therefore any collision it has with other shapes or the figure's edge. The touchBorder is used to determine when a touch event is on the shape.
The border and touch borders can be defined with either the drawBorder or drawBorderBuffer directly, as a rectangle with or without some buffer around these properties, or as a fully customized TypeParsableBorder.
The documentation in OBJ_Generic has the specifics on how to define borders and touch borders for FigureElementPrimitives. Similarly the documentation for @{OBJ_Collection} details the same for FigureElementCollections.
The border for a FigureElement can be retrieved with FigureElementPrimitive.getBorder and FigureElementCollection.getBorder
When debugging, the borders and touchBorders of all shapes can be shown with Figure.showBorders and Figure.showTouchBorders.
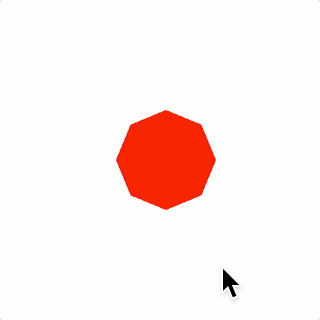
Borders and touch borders can be created during an object's creation:
const figure = new Fig.Figure();
figure.add(
{
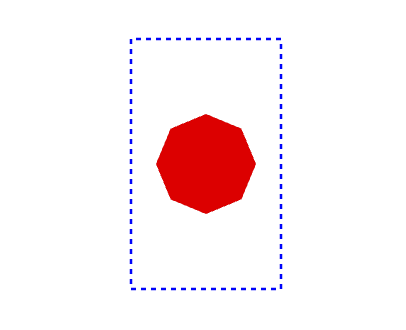
make: 'polygon',
sides: 8,
radius: 0.2,
// create a touch border that is a rectangle around the border
// with a buffer of 0.1 on the left and right, and 0.3 on bottom
// and top
touchBorder: [0.1, 0.3],
touch: true,
color: [1, 0, 0, 1],
},
);
figure.showTouchBorders();
Three Dimensions
In two dimensions, polygon borders are used to define where a figure element can be touched. This is useful in examples such as equations, where equation elements are touchable, but spaced different to each other, so maximizing touch locations between elements means having touch borders that have different buffers on each side of the element.
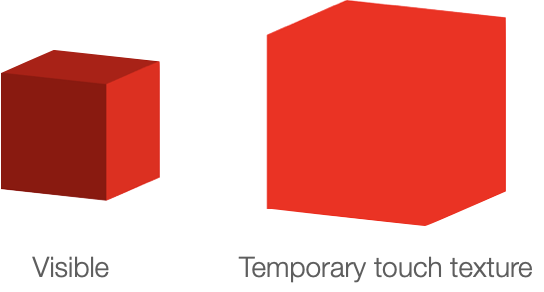
In three dimensions, defining volumes in which to select becomes challenging, both to define the volumes and to decide which volume was selected in a quick time on lower end client devices.
Therefore, selection of 3D objects is performed in FigureOne by:
- Rendering each touchable element into a temporary texture
- Each element is rendered with a unique color
- The temporary texture pixels are mapped to the screen pixels and the corresponding touched pixel found
- The color of the pixel touched is mapped to the figure element with that color
This method is commonly used, performant, simple (as complex touch volumes don't need to be defined), and will automatically handle depth - elements in front of other elements relative to the camera will be selected.
When a larger touch border is required for a 3D element, use the touchScale property to scale the element in the temporary texture.
When debugging, the Figure.showTouchable method can be used to render the temporary texture being used to determine what is touched to the screen.
const figure = new Fig.Figure({ scene: { style: 'orthographic' } });
figure.add({
make: 'cube',
color: [1, 0, 0, 1],
touch: true,
touchScale: 1.5,
});
figure.showTouchable();
Move Interactivity
Once an element is touched, it can be moved.
To make an element movable, use the move property during its definition or use FigureElement.setMove on an instantiated element.
const figure = new Fig.Figure();
figure.add(
{
make: 'polygon',
sides: 8,
radius: 0.2,
move: true,
color: [1, 0, 0, 1],
},
);
By default, element movement will be translation. OBJ_ElementMove options can be used to make movement a rotation or scaling and add bounds to movement.
Moving Freely
When an element is being moved and is released it can either immediately stop, or continue on with its current velocity and some deceleration (move freely).
By default, elements will move freely after they are released (if they were released during movement). The options for if and how they move freely are set within the OBJ_ElementMove options object.
This example makes the free movement deceleration small (so free movement is pronounced), and only allows movement within rectangular bounds.
const figure = new Fig.Figure()
figure.add(
{
make: 'polygon',
sides: 8,
radius: 0.2,
move: {
freely: {
deceleration: 0.01,
},
bounds: { left: -0.8, bottom: -0.8, right: 0.8, top: 0.8 },
},
color: [1, 0, 0, 1],
},
);

Notifications
Often it is desirable to change the state of other elements when an element is moved. Use the FigureElement's NotificationManager to get notifications when an element has moved. Useful notifications are:
beforeMove- sent before the element transform has been updated with a move eventbeforeMovingFreely- sent before the element transform has been updated with a move freely framesetTransform- sent after the element transform has been updated
Three Dimensions
In three dimensions a choice needs to be made about how a mouse of finger movement on a 2D screen translates to a movement in 3D space.
The default way to do this in FigureOne is to use a movement plane (element.move.plane). FigureOne will automatically project a movement on the screen onto this plane and move the element accordingly.
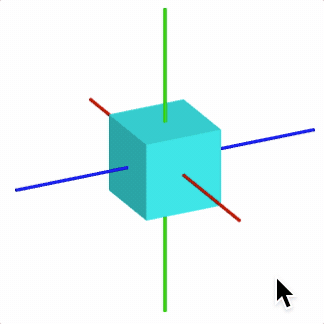
For example, to create a cube that can be translated in the YZ plane:
For the following examples, use 3D boiler plate.
// Add a grid in the YZ plane
figure.add([
{
make: 'grid',
bounds: [-0.8, -0.8, 1.6, 1.6],
xStep: 0.05,
yStep: 0.05,
line: { width: 0.002 },
color: [0.7, 0.7, 0.7, 1],
// By default, the grid is created in the XY plane
// To rotate it to the XZ plane rotate π/2 around the y axis
transform: ['r', Math.PI / 2, 0, 1, 0],
},
]);
// Add a red cube movable in the XZ plane
figure.add({
make: 'cube',
side: 0.3,
color: [1, 0, 0, 1],
move: {
plane: [[0, 0, 0], [1, 0, 0]],
},
});
![]()
Camera Interactivity
In 3D figures, it is often useful to allow a user to change the scene manually using gestures. This can be achieved by changing the scene with setCamera to change the camera location and setProjection to change the expanse of visible space.
FigureOne also provides a built-in FigureElementPrimitive cameraControl (see OBJ_CameraControl) which defines a transparent rectangle in which the user can swipe horizontally to rotate a scene around a vertical axis, and swipe vertically to change the elevation of the camera relative to the vertical axis.
figure.add([
{
make: 'cube',
side: 0.5,
color: [0, 1, 1, 1],
transform: ['r', 0, 1, 0, 0],
},
{
make: 'cameraControl',
},
]);